Visit Us On Our Other Channels

Our DIY Homestead

Making Homesteading Accessible to All

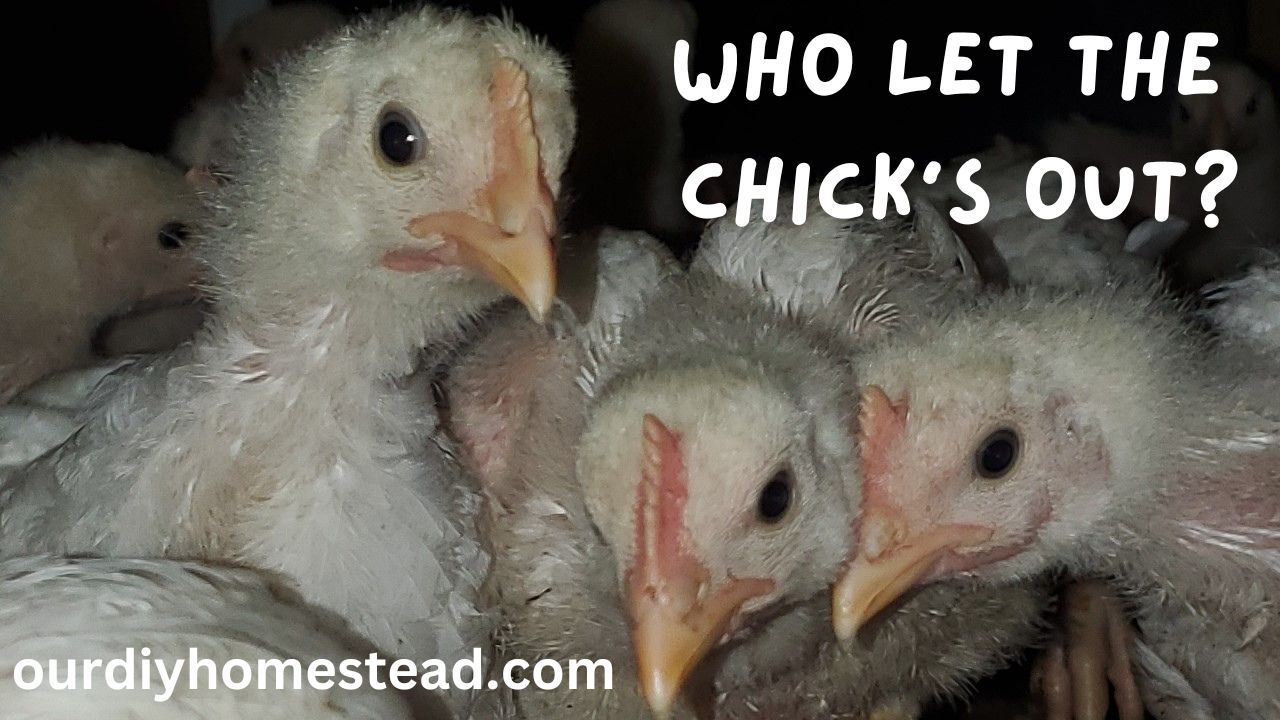
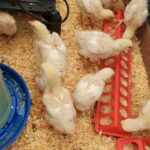
Adding a Hydroponic Garden

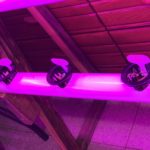
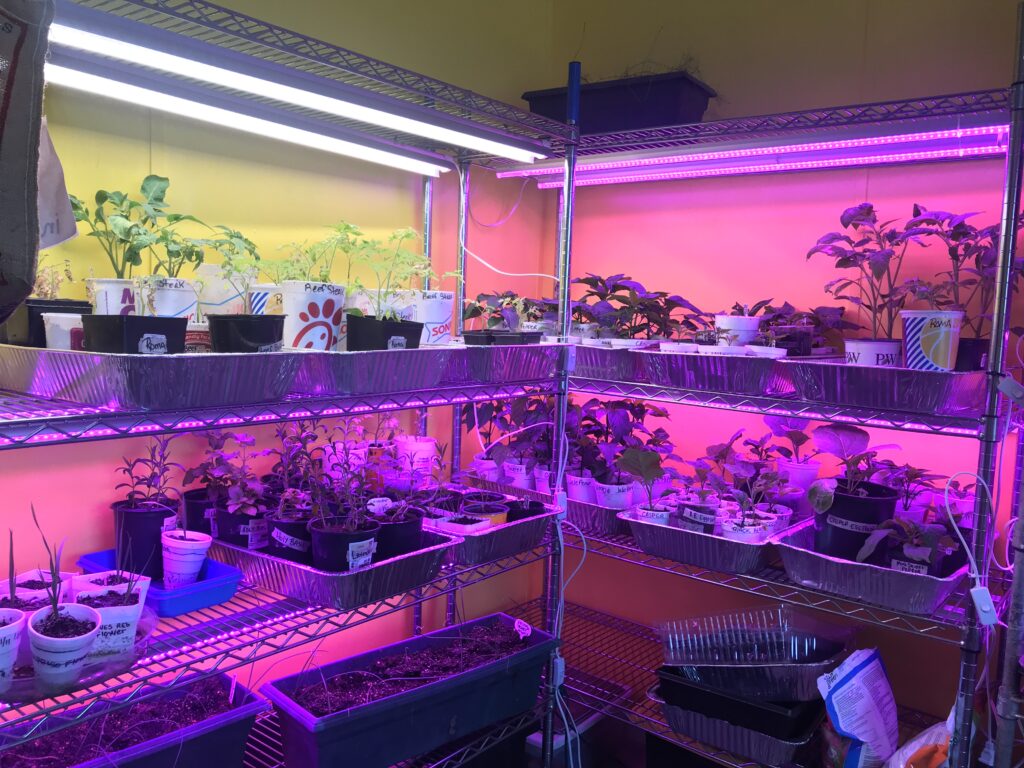
This week we are adding a hydroponic garden in the grow room. I’m excited about it for several reasons! Fresh garden salad veggies in the middle of winter. Knowing were the end product comes from is becoming more important with the outbreak of the different diseases being reported. Affordability of my salad fixings; lettuce, herbs, tomatoes aren’t going to break my bank this winter. I plan on growing them all in my hydroponic system. Come with me and I’ll show you what I’ve been up to.

Hydroponic Gardening and Food Security

hydroponic system

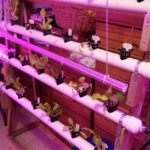
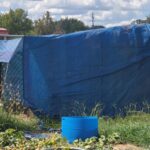
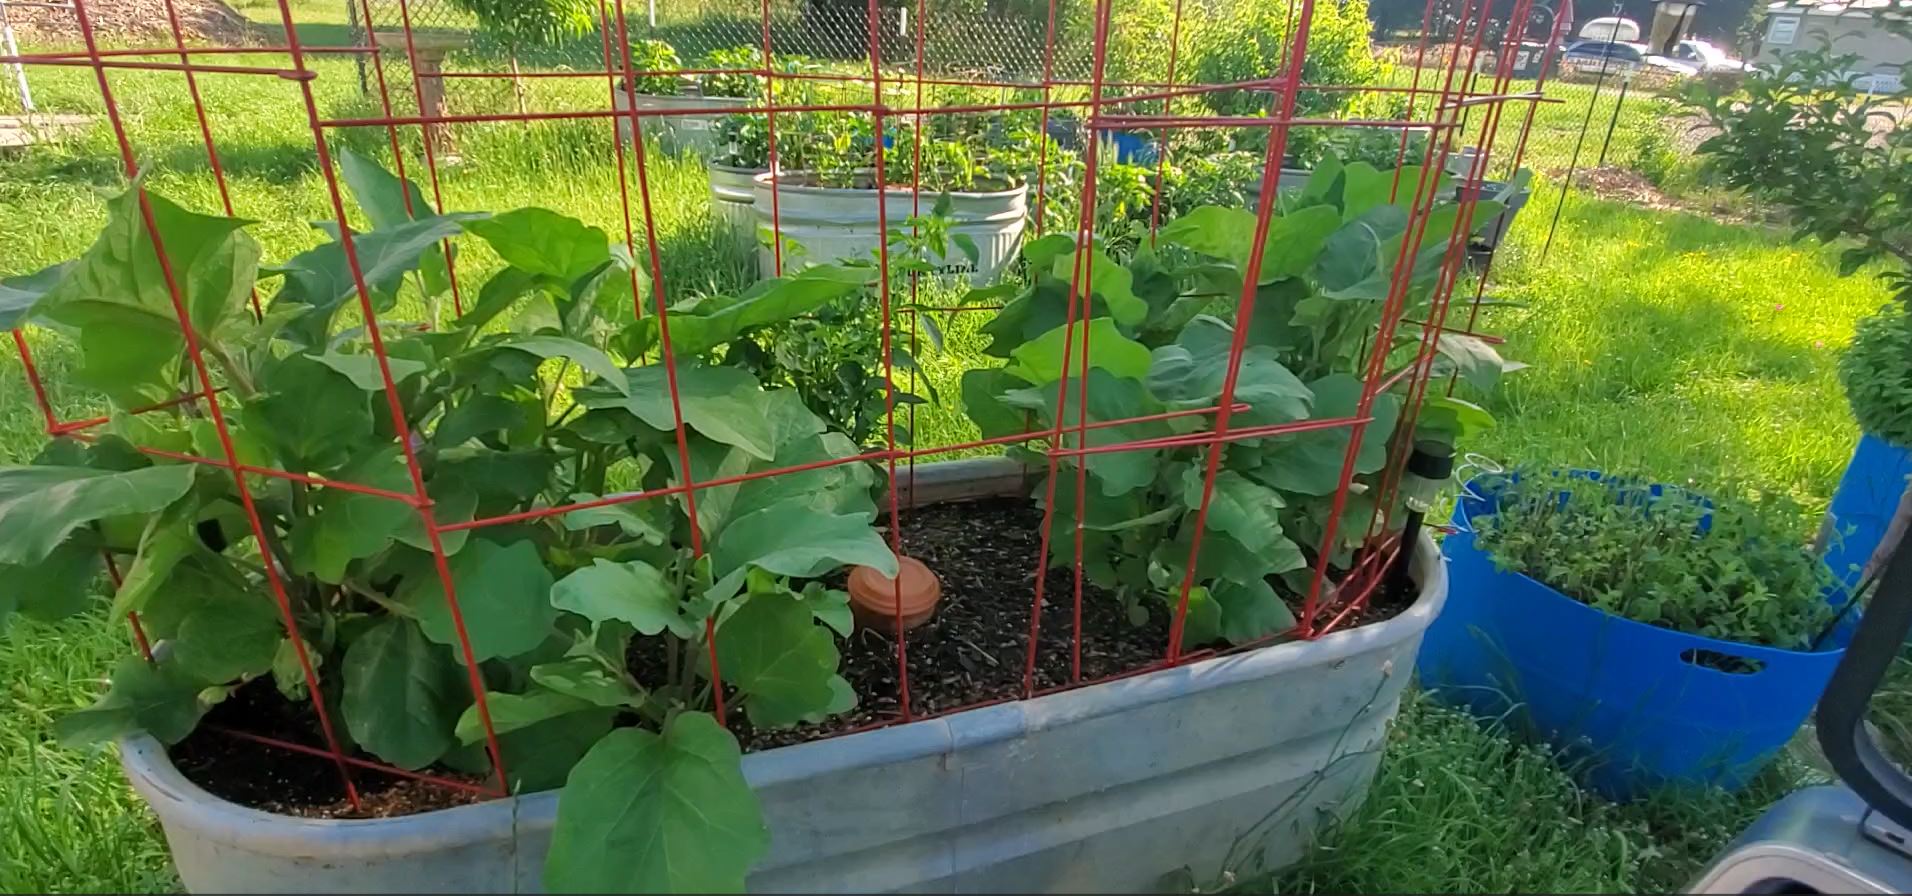
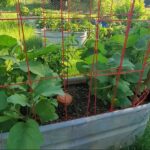
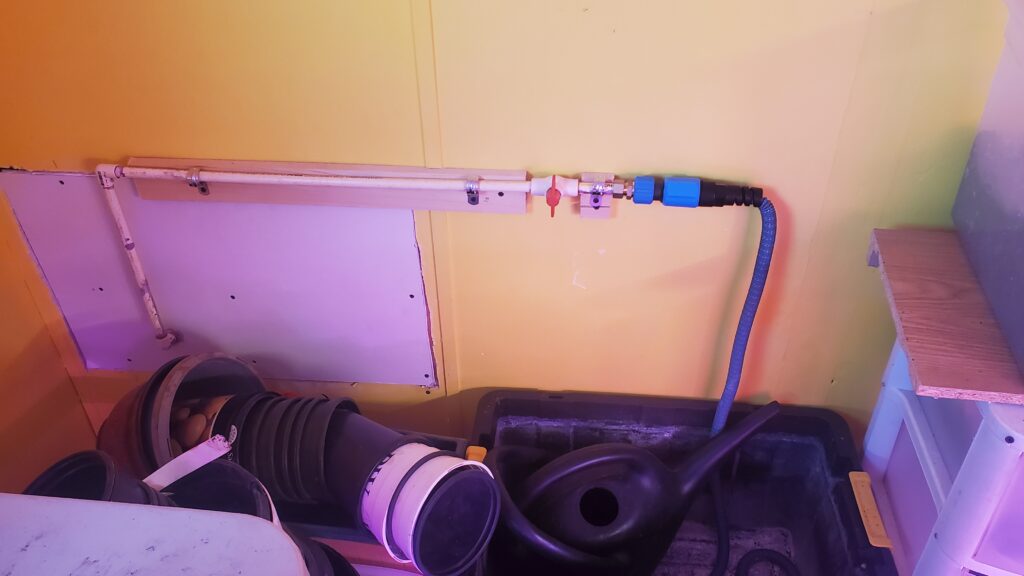
Having security with my food system is one of the main reasons I started hydroponic gardening. The vegetables are grown in a medium that allows nutrient water to wash over the roots without anything touching the vegetable itself. Also having the option of moving the system inside or out makes it easy to manage and keeps it out of harms way. I talk about that more in this article.

Affordability of Hydroponic Gardening

lettuce from hydroponics

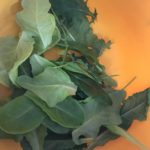
Affordability is one of my favorite things about hydroponic gardening! Upfront, only a system which can be as easy as a bucket is needed; you will need some nutrients for your system. Water is needed and then a seed for each veggie you want to grow. Put it altogether and I will bet that it will still be less then a trip to your favorite grocery store produce isle. Plus, it will taste so much better as well! Do I have you convinced? I plan on keeping my hydroponic gardening updated for you. We will be talking about what kind of nutrients and how to add them to the system and show you how my salad fixings are growing.

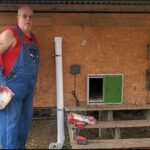
Oh yeah, one more thing. I promised in the video, plans to build a hydroponic system. Here is how to build your very first hydroponic system. Simple prints for a simple system that can save you time and money when it comes to your salad fixings.

Here is to your homesteading dreams,

Shawn

Chicks, Chicks, Market Chicks

There really isn’t anything cuter then baby chicks in my opinion. About 5 weeks ago we got 30 cute little fluffy, yellow, chirping chicks delivered to our house. Now, fall isn’t the normal time for most people to get chicks because of the cold season approaching. However, we are not most people! We live in baked North Texas and with it being the middle of October we are still seeing temps in the 90’s! There are drawbacks and positives to the weather being like this. One of the positives is that we have the time to raise a batch of market chicks. This normally takes 8 weeks, give or take. Here is a sweet video on when the market chicks were released from their brooder and put into their first outdoor space.

Thoughts on Market Chicks

I know people are having a hard time with understanding how we can take these cute little chicks and love them and take care of them. And in 8 weeks butcher them and put them in the freezer. But, I think it makes more sense then going to the store and buying chicken without knowing how it lived it’s life, the things it was feed and then how it’s life ended. We care how we take care of chickens on our homestead. Check out this blog.

Feeding and Watering Market Chicks

We feed a medicated start and grow chick feed along with fresh water every day. It’s important to get them off to a healthy start. As market chickens there is a set amount of weeks that we want to feed them. When they outgrow our brooder they go into a small outdoor area where they will stay until they get big enough for them to be put into our grow out pen which is in pasture.

That is where we are in the process of growing out this fall’s market chicks. I like to go into winter with a freezer full of chicken. I have a page here where I have shared some of our chicken recipes. Please check it out.

Here is to your homesteading dreams,

Shawn

Market Chick Brooder Installation

We had market chicks coming which was a good thing since I’ve been out of chicken for a couple of months. But… there was another problem, where were we going to put them? In case you don’t know there are companies that sell chicks and send them out all over the United States through the mail. This is how we get our market chicks, they arrive through the USPS in little boxes and when the post office calls we go pick them up. And we need a place to put them once they get to us. Check out this video and Ron explains how and what he did.

Market Chicks in the Brooder

Chicks are not born with feathers, they have fuzz all over their bodies. So, they need a place that is warm, the temperature they need is in the 90’s to begin with and then as they mature and more feather form the temperature can start to decline. A lot of people put the chicks in a smaller type box called a brooder and keep it in a building out of the weather. We had the brooder box we just did not have a place in a building to keep them out of the weather.

Brilliant Idea

What we did have was a section in the chicken yard that was narrow and we used it to separate a sick or hurt animal. It was a perfect spot to create the warm, out of the weather area that we needed for the chicks! Ron created support at the top of the chicken fence and then draped a tarp over it. Then secured it so it won’t blow away, creating the perfect little area for the chicks as they grow. Raising chicks is a lot of work. Here is an article that goes into that more.

Tips for Creating a Safe Outside Market Chick Brooder

Some tips that we have learned during this process is to overbuild in security of the chicks. Predators come in many shapes and sizes and you want to make sure they can’t get through to your precious chicks. Weather is also something to always think about. Here in North Texas we had to worry more about not roasting our little chicks but in the North you have to worry about cooler temps. Know your weather.

Let me know if you raise chicks and have a brooder. I’d love to hear about it.

Here is to your homesteading dreams,

Shawn

The Dream of a Seed

For those of us in Northern Hemisphere most of us are thinking of winter gardens with a dream of a seed in our heads. That is where it all begins! What can we grow with a shorter amount of daylight and with winter improaching upon us. For me that means a lot of root veggies and brassicas. Check out this new video of Ron planting some of our brassicas here.

Starting Seeds

Those seeds are easy to plan and start for your winter garden. I start seeds a little differently then some by sprouting the seeds before I plant them in soil. It seems to give me a better percentage of live plants then if I just put the seeds in soil. I get a rush when I realize that the one seed that I have started by sprouting it, then planting it and often transplanting it once before it goes outside ends up as a plant that creates food for us. I like the rush of that feeling! I explain it better here in an article I have written.

Planting Seeds

So, there are seeds that I start early and transplant out in the garden. There are also seeds that go directly into the garden. I think of carrots and beans. With carrots I will seed them directly in the garden when it cools down and they will grow from Fall to Spring. I’ll harvest them just in time to put some warm weather crop in their old garden space. Beans and beets seed I planted directly into the ground as well and since they grow at a faster pace then carrots I normally can get a harvest before cold weather hits us down here in north Texas. Here is a fun blog I wrote about carrots.

I hope you are making plans for your fall garden. Feel free to leave me a note about your favorite fall veggie.

Here is to your homesteading dreams,

Shawn

Beneficial Bunnies for the Garden

Most of the time when one thinks of bunnies in the garden it is more with dread then with benefit. After all, the cute little creatures might of just nibbled on your beautiful garden veggies. There is even the chance of finding cute little baby bunnies hidden under your mulch while mommy is out grazing somewhere else. But I’m not necessarily speaking of the whole rabbit when I mention beneficial.

Meet Ricky and Lucy

Ron and I did purchase a couple of cute lionhead mix bunnies this past weekend. They are so cute you will meet them and see the bunny set up we have now by clicking here. Their names are Ricky and Lucy. Ricky is the handsome, hairy black bunny and Lucy is the pretty petite white bunny with blue eyes.

Beneficial Bunny Poo

Now, stick with me, I’m not going to have my entire bunny in the garden… just their poo. Bunny poo is what is called a cold manure. What that means is that it can be added to the garden immediately without composting it. Most animals that have pelleted manure such as rabbits and goats can have their poo applied to the garden soil in place of other type of fertilizer as soon as it comes out of the animal. I wrote about the importance of bunnies and how to make the most of their poo.

Easy Set Up to Get the Most Bunny Poo

Our bunny cages are wire so the bunny poo drops right through to the ground. It is important to make sure that they have a board or some surface that they can rest on off of the wire so their feet don’t get sore. The important thing to remember is to gather the poo as it falls. It is so much easier then to have to rake it up. We put containers underneath, we even have had our rabbit hutches over our compost piles. Here is a video to show you that.

Sharing the Harvest

When we have some weeds or produce from the garden that we don’t want it is so nice to share it with the bunnies. They have a way of showing how much they appreciate it. Ricky jumps right in the middle of it and starts eating immediately while Lucy is a little more cautious and nibbles at the edges. I enjoy having the bunnies for many reasons. Tell me about your bunnies. I’d love to see pictures of them.

Here is to your homesteading dreams,

Shawn

cantaloupe & watermelon patch

Benefits of a Fall Garden

Lack of Heat & Bugs in the Fall Garden

The benefits of a fall garden for one is the lack of bugs and heat. In North Texas both are an extreme problem during the summer. With the hundred degree weather right now and most of my summer garden dead I am looking forward to cooler weather the ease of a fall garden. If you are having the same hot summer as I am I just wanted to encourage you to not give up on gardening before you look into having one in the fall. There can be great reward in the garden you raise as well as in your mental state of mind.

Bugs in the garden

I live in zone 8a, North Texas and when I say our summers are hot I am not exaggerating! We deal in 100 degree days fairly regularly which is very hard on a plant. I wrote an article on weather and gardening here.

But there is hope! With the end of August the days get cooler and the bugs get fewer. I am in fall garden mode!

We have already talked about the first benefit of gardening in the fall and that is the lack of heat and bugs.

Root Veggies and the Fall Garden

Veggies in the fall garden

I think the fall garden is perfect for root veggies. I can’t get carrots or beets to grow during the summer garden. But in late fall I can spread some carrot seeds out in a raised bed and end up with beautiful carrots in the Spring. Check out my blog about growing carrots here. There are so many delicious root veggies to choose from and the wonderful thing about them as some get sweeter in taste as they are touched by the cooler weather.

Enjoying a Breath of Fresh Air

To me one of the biggest benefits of a fall garden is just enjoying being outside. Having dirt under my finger nails and the wind blowing in my face. It makes me feel alive again and enjoying the act of gardening; planting seeds, watching seedlings grow and the crunch of a veggie as I take a bite out of it. Like I said earlier the garden you raise can be helpful to your mental state of mind.

Please take a moment and check out the video I did for you. It tells about how 2024 has been a hard year for us. But the fall garden is calling and I’m getting ready for it. I hope you are too!

Here is to your homesteading dreams,

Shawn

Let’s Make Healthy Homemade Dog Food

Hey friend, do you have dogs? Yeah, me too. Actually, I’ve got three… three chihuahuas. For years I bought dog food started out with dry and then we started buying refrigerated dog food with meat and veggies. The dogs liked that food but it is expensive! That got me to wondering if I could make the same thing for a lot less money. Now, this is probably true for anyone who wants to put a little time and effort into sourcing product and then creating the product, ie: dog food.

You can watch a video here of me making dog food.

Protein in Dog Food

LOLA

I have several chickens in the backyard and get plenty of eggs and they are good protein. I also knew dogs needed some meat in their diet. We have market chickens on the homestead and I keep all of the organs such as heart, liver, and gizzard. (Now you know I love my dogs if I’m willing to clean a chicken gizzard for them!) I also cook whole chickens and break them down and cut them up for the girls. This next Spring we will be ordering some turkeys and plan on having some turkey meat I can grind up for them.

Vegetables in Dog Food

I am no veterinarian but I think vegetables are important to my dog’s health as they are to a person’s health. Now, if you want to add veggies to your dogs food please do some research because there are veggies that are toxic to dogs. I add sweet potato, carrots and green beans. Most of the time I use carrots and green beans from the garden. I started using these because they were available without me having to buy anything but also because I knew they were healthy for my girls.

Creating the Food

To save time I have seen a lot of people use their Instapot to cook their dog food. I don’t have one of those so I boil the veggies and the organ meat. Scramble the eggs and chop everything very small. Remember, my girls are little and old. You know the bite size that is right for your dog. Now, serve.

I feel so much better making dog food for my chihuahuas. I know there is nothing added that can be harmful for them. They eat so much better which fills their bellies and keeps them as healthy as possible. By the way you got to meet each of the girls in picture. Top picture is Chi and me, she is 15. Second picture is Lola, she is the boss and her job is to walk with me to the bathroom. And the third picture is of Honey Bear, she lives up to her name. She is a honey.

I hope you try making some dog food and then decide if it’s something you can do long term for your best friend. Leave a comment and let me know if you are going to try and I’d also love to see a picture of your dog.

Here is to your homesteading dreams,

Shawn

Doing Mid-Summer Morning Chores

I thought you all might like to go along with Ron and do the morning chores on this hot summer day. We have chores down to pretty good system. Ron still works a full-time job so systems are needed here on the homestead. Right now our animals are easy to care for and we are very careful to make sure that we don’t bring in any high maintenance animals for now. I’ll bring you along with pictures but if you want to get a real behind the scenes view check out the video here.

chicken

Feeding the Laying Hens

Right now the only chickens on the homestead are our laying hens. There are 14 of them and we have them free ranging in a part of our pasture where they get their fill of grasshoppers and other delicious bugs. To help make sure they continue laying, they are fed a laying crumble which gives them the protein that they need to keep laying big beautiful eggs. Our hens lay eggs in the colors of green, blue and brown.

The system we have for feeding the laying hens are gravity fed tubes. Here is an article that explains how to make your own gravity fed tubes. Ron fills them on the week-end and there is enough laying crumble to last through the week for our hens. He does have to go out every morning and clean the water troughs out and give them fresh water every morning. Right now he also puts a freezie bottle in each waterer during these hot summer months.

Feeding the Honey Bees

Bee and blossoms

Our honey bees are pretty self-sustainable, however, in this heat just about every plant has died and any blossoms that the bees could fed off of have withered away. So, Ron does give them sugar water during this time. This helps feed and hydrate the bees until fall. He feeds both hives every other week or so.

He never knows what kind of mood the bees will be in, laid back and easy to get along with or… in the mood to sting! After a couple of stings he has decided to suit up in a bee suit and to use his smoker. The smoker helps to relax the bees and make them easier to work with. Here is a look at when he first brought the bees home.

Hope you enjoyed doing chores with Ron. Let me know what kind of chores y’all have to do out here in the heat.

Here is to your homesteading dreams,

Shawn

Carrots, Carrots, Carrots!

Carrots, Carrots, Carrots, we just harvested our fall carrot crop and were very pleased with it. I thought we would talk about the best way to harvest them from the garden, how to store them long term. I might even share one of my favorite carrot recipe.

Harvesting Carrots

When you harvest carrots and plan on storing them the best way to do that is to gently wipe the garden soil off them. A gentle hand going up and down on the carrot wiping the dirt off is as far as you want to go cleaning the carrots. Don’t wash the them off with water.

Carrot Tops

Next, cut off the carrot tops right above the carrot. We do this for two reasons, one it makes it easier to store the carrots and secondly, the tops draw moisture from the carrot. Now, there are several things that you can do with the tops. Making pesto with the tops is delicious! We really like it with root veggies. If you have animals they like the tops too. If you don’t use them in those ways you can compost the carrot tops.

Storing the Carrots

The next thing I do to store them is to create bundles of 12-15 carrots. Then I wrap them in a damp paper towel. Put them in a plastic bag such as a grocery bag and tie the handle. Then store them in the bottom of the fridge. A 2nd fridge makes it convenient to store and then take out a bag as you need it. If you would like to see how I set it up I have a video that you can check out here. If you would like to see more garden videos please subscribe to the channel. Here is a link to the YouTube channel. Hope you enjoy!

I promised you a carrot recipe that we really enjoy during the summer. Carrot salad is so easy all you need is 4-6 shredded carrots, 2-3 cups of raisins, an apple cut in bite size pieces, and then about a cup of mayonnaise. Stir and enjoy, Yum! Let me know if you like carrot salad.

Here is to your homesteading dreams,

Shawn

Water Problem in the Grow Room

I have a story to tell you…about a water problem! Now, this story is of a girl and she has to get water to her inside grow room. There are lots of plants in the grow room… I mean a LOT of plants! Here is a picture so you can see how serious I am.(sorry for the pink background, it’s from my grow lights.) For those of you who don’t know I am a full-time wheelchair user and have faced the difficult chore of watering all of my plants. My husband, Ron normally brings in 5 gallon buckets of water. I would scoop and pour water into each section. It took a lot of time and was very messy. Usually, I ended up mopping the floor after every watering. There had to be a better way!

Seeing The Water Problem

It just so happens that my grow room is right next to the bathroom. My wonderful husband (I hope he reads this so he knows I’m giving him public recognition!). Knew how difficult the watering chore was. He decided to fix the water problem. He was able to splice into the cold water line connection from the shower and run a water line into the grow room! If you would like to see part 1 of how he did that check it out here.

Fixing The Water Problem

This is an easy DIY project that many homeowners can do themselves. After a trip to the local hardware story or a quick shopping trip to Amazon for cpvc line, elbows, tees, ball values, hose adapters, primer and glue (affiliate links to above for parts) we are working on getting a permanent waterline into the grow room.

Stay Tune for Part 2

If you would like to see how Ron used all of the parts to create a permanent water line into my grow room you can subscribe to our YouTube channel to keep up with the water problem in the grow room.

Here is to your homesteading dreams,

Shawn